Undoubtedly, solar energy is a promising industry, and installing and connecting a solar battery gives the owner of the device a lot of advantages. But in order to take full advantage of all the advantages of such alternative energy , you need to know how to properly assemble, connect and install solar panels. The final result largely depends on this, because the installation of solar panels for a house or for any other object is not cheap, so you need to follow the instructions as clearly as possible and do everything right.
How is the power supply scheme with solar panels
The solar battery itself is a construction of a certain number of modules (semiconductor photocells) that generate energy. Depending on the need for the amount of energy “at the output”, in order to increase the output power, solar panels are combined with each other into solar power plants. This includes a whole set of equipment that is needed to convert solar energy into electric current.
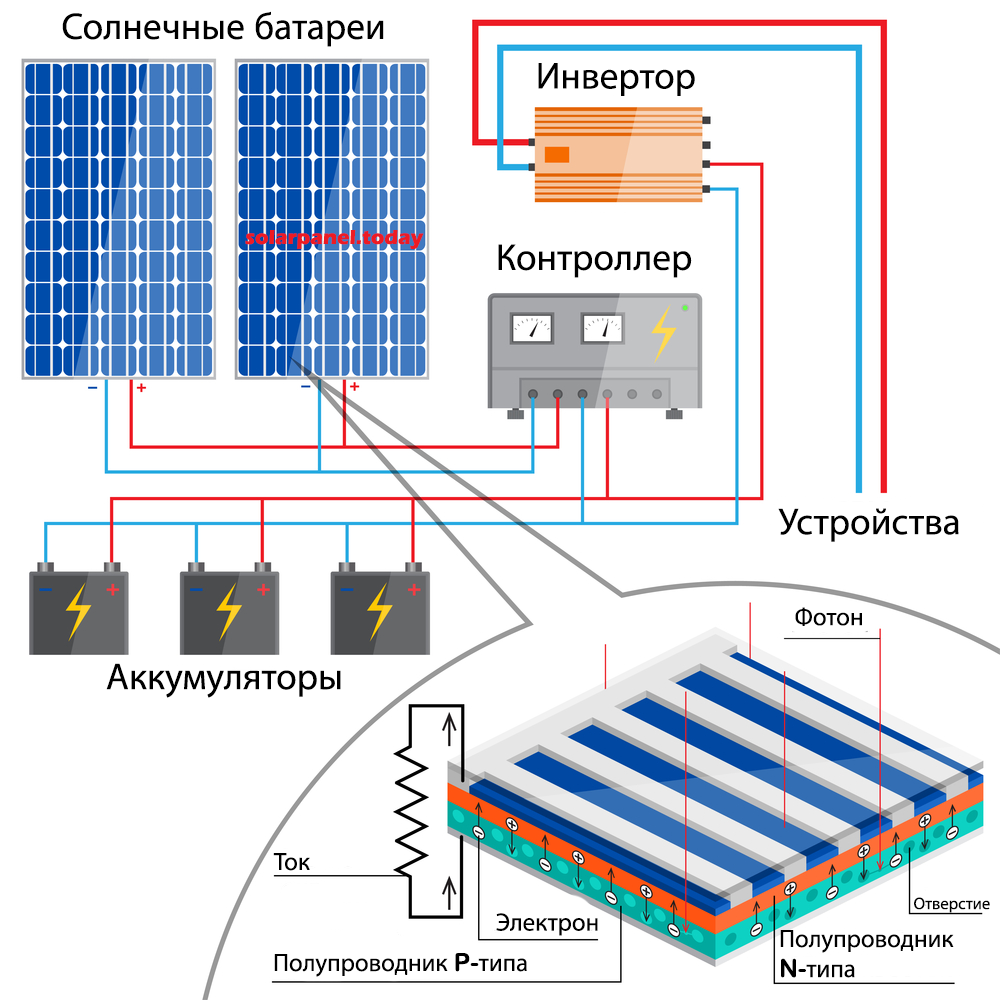
To connect solar panels, you will need the following accessories.
- Solar panels directly. Their type, number and size you choose depending on your tasks, needs and budget.
- Rechargeable batteries (ACB). Chemical current source. This is where the energy generated by solar panels will accumulate. Therefore, when choosing a battery, you need to focus on its capacity – the larger the capacity, the greater the supply of energy for consumption needs. It is not recommended to use car batteries in such schemes, because. they are unable to withstand frequent recharging. It is better to purchase AGM (service life 4–5 years) or gel batteries (service life 9–11 years).
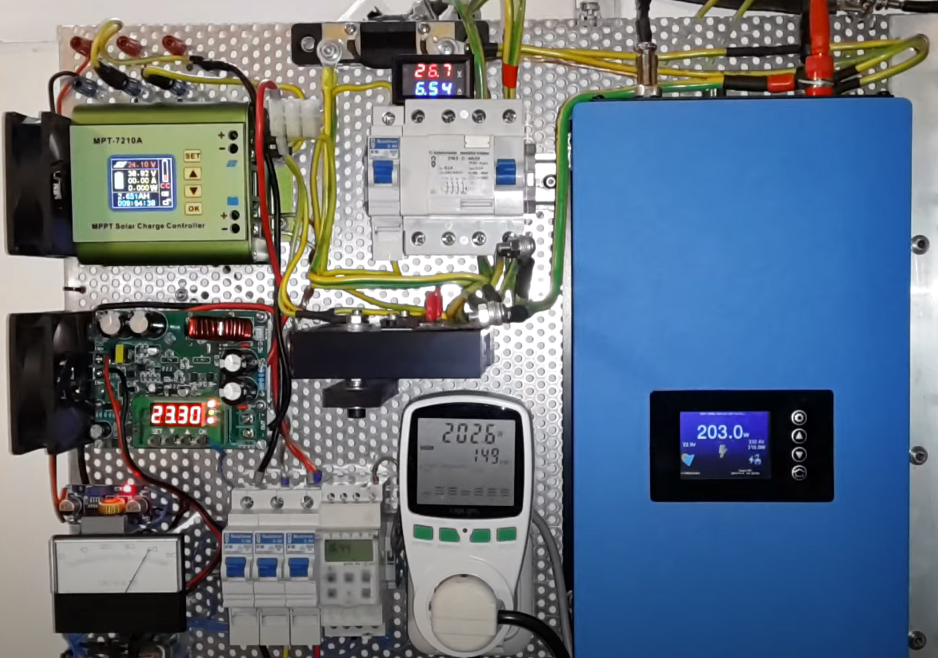
- The charge controller is an important device that performs several functions at the same time and allows you to extend battery life. Firstly, it automatically controls the battery charge: it regulates the energy supply from solar panels, which protects the battery itself from complete discharge, and when fully charged, disconnects the battery from the system. Secondly, the controller protects the solar panels themselves: turns them off when fully charged and turns them on for charging at the moment when the energy starts to be consumed. The controller also prevents the flow of reverse currents in cloudy weather and at night. It also helps you choose the optimal charging mode, which increases the amount of stored energy and increases battery life. Modern controllers are equipped with a special panel with a display where you can see the voltage of the batteries. And “advanced” controllers support efficient charging with the help of special algorithms and programs.
- inverter. With this device, the DC voltage from the battery is converted into AC 220 V, which is used by the end user. Inverters can have different technical characteristics – power, quality of the received voltage. Therefore, when connecting solar panels in the house, you need to pay attention and choose an inverter of suitable power – depending on the electrical appliances that the solar installation will serve. Inverters can also perform the function of additional protection of the electrical network.
- Fasteners and wires for communication and connection of solar installation components. You may also need fuses (relays) that are placed between all elements of the system and protect it from short circuits.
This is the simplest scheme for assembling and installing solar panels for a home, with a minimum of components. Due to the fact that there are practically no moving parts in it (except for the possible replacement of the battery), such a system can stand for decades.
You can even connect solar panels according to this scheme in an apartment or house, and they will serve household appliances (refrigerator, TV, lighting system, submersible pump). But if you need to ensure the operation of equipment that requires a lot of energy, for example, an electric boiler, then you will need more powerful and expensive equipment and, most likely, expert advice.
How to properly install a solar panel
You need to start by choosing a place for installing and connecting a solar battery. First, decide on the area – batteries can be bulky and you need to have enough space. Secondly, the degree of illumination of the installation site is important, the more, the better – in this case, the solar system will be as efficient as possible. A good choice may be the roof, walls, facade of a private house, the territory adjacent to it, the balcony of an apartment building.

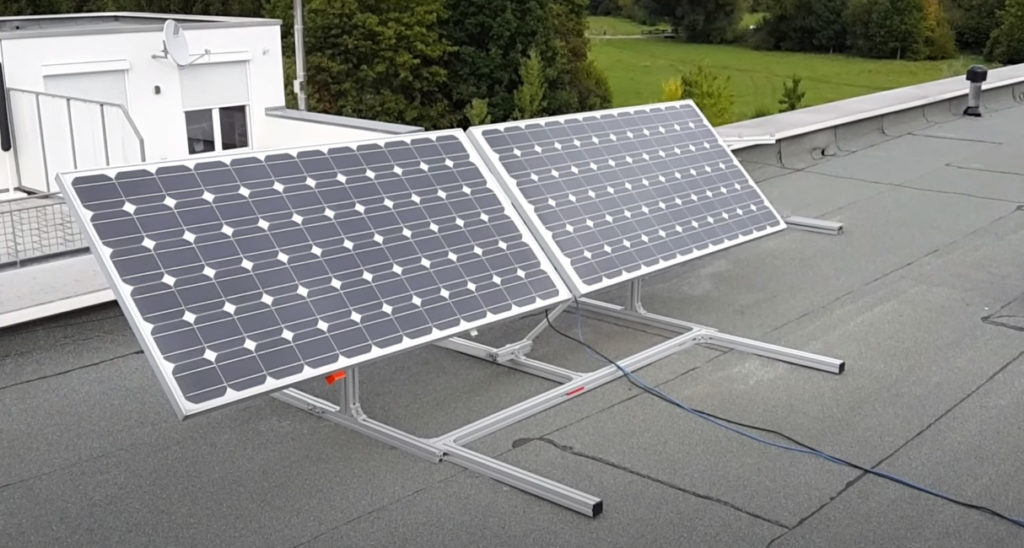
When installing solar panels , it is necessary to observe the correct angle of inclination relative to the horizon and the orientation of the solar structure – the light-absorbing front (or facade) surface of the panels should be directed to the south. The maximum return of the solar panel gives when the rays of light fall at an angle of 90º. Therefore, depending on your region and climatic conditions, consider such an arrangement of solar panels so that the angle of incidence of light is optimal for the maximum time during daylight hours. Perhaps, for more efficient operation of the solar battery, the angle of inclination will have to be changed periodically, depending on the season or weather. If you are installing a solar panel on the roof of your house, it is preferable that the angle of inclination be around 45º. At smaller angles, solar panels are installed on additional special structures that help to ensure the desired angle of inclination, system rigidity and stability.
To install and mount the solar battery, special fasteners are used, including rails, to which the panel itself is attached. The solar array must be fixed at least four points during installation with clamps or bolts along the outer long side of the aluminum frame. It is preferable to use the special mounting holes/seats provided in the design.
If the solar panels are connected to each other in a chain, make sure that they are located in the same plane and at the same angle – so their work will be more efficient. If you are installing solar panels on a site adjacent to the house, choose an open and as unshaded place as possible, without trees, bushes or any structures that can cast a shadow. Also, do not forget about the air circulation between the installation surface and the ground – you need to raise the panels at least half a meter from the ground.
When properly installed, the performance of solar panels will be the same both in winter and in summer, but only in clear and sunny weather (in winter it is sometimes even more efficient due to the lack of overheating). The design of solar batteries is thought out so that all equipment can work in different climatic conditions and withstand temperatures from +80ºС to -35ºС.
Connecting the solar battery – the main steps
The design of a solar panel is quite complicated, therefore, during installation and assembly, one must strictly adhere to the instructions, the technical requirements of manufacturers for devices, and the wiring diagrams for all components of the solar system. Do not exceed the technical requirements of other devices for maximum voltage and current.
When connecting the elements, it is necessary to ensure that the polarity is observed. It is advisable to check (measure) the open-circuit voltage of the entire array of solar panels – if it differs from the passport value, then something is connected incorrectly in the circuit.
It is best to connect the system using single-core copper wires with a cross section depending on the length of the wire and current, but not less than 0.4 cm 2 , with an insulating braid that is resistant to UV rays. If wires without such a braid are used, then when they are installed outside the building (on the street), a corrugated sleeve is required to lay the wires. When connecting solar panels, only special connectors (MC4 standard) are used. Connect wires and connectors using a special crimping tool or soldering.
Connecting a solar battery usually occurs step by step and in a certain sequence. Let’s consider these steps.
Step-by-step instruction
- Using a cable, connect the battery and the controller. The controller regulates the charge / discharge of the battery and is like an intermediary between the battery and solar panels. On the other hand, an inverter is connected to the battery, which converts the current. This connection option is considered optimal, although there are other connection options. If necessary, you can install several batteries by connecting them in series. They are most often installed on a metal rack with a polymer coating.
- In the same way, the controller is connected to the solar panels. In addition to the main function – to monitor the battery voltage – the controller, if necessary, disables certain elements. For example, at night, when the battery voltage drops below 12V or during the day, when the voltage at the battery terminals reaches 14V, which indicates that the batteries are being recharged, the device interrupts charging. The controller must have a solar panel icon so as not to mix up the connectors. If you need to connect and install not one, but several batteries, then each subsequent solar panel is placed parallel to the previous one.
- Connecting battery and inverter. The inverter is connected to the solar system, when the equipment and appliances in the house that need to be powered by electricity are powered by 220V – the device converts the DC voltage of the battery into AC (220V). In exceptional cases, for a 12V system, an inverter is not needed.
- Distribution for supplying energy to the consumer. At this stage, the received solar energy, transformed into electrical energy, is delivered directly to the place of use – the consumer (household, lighting fixtures, etc.).
When connecting all the components of this circuit, you must clearly follow the instructions for each device, which is usually attached.
In order to avoid inconsistencies in equipment parameters and any inconsistencies, it is better to purchase devices not separately, but the entire system as a set. This is especially useful for those who want to install and connect solar panels on their own, but do it for the first time. Instruments and equipment that are completed are compatible in terms of power, capacity and other parameters, which means they will work smoothly and efficiently. So you will best provide your facility with clean and high-quality energy in the quantity you need.